Half a year has gone by like a whirlwind, with no time to craft, let alone post to my blog! Slowly, ever so slowly, our baby is now learning to sleep through the night, leaving me a little less exhausted than I have been all these months. Arrival of the spring season makes me want to clean up and finish all those projects that had been put on hold! As each year, by the end of winter, mice become a real pest at our house. They raid our laundry basket and eat the stains in the children's clothes, thereby ruining many a favourite piece ;( Ofcourse I'm to blame too: because I can't bear to kill them, we set live traps an expell them from the house when we catch 'em. I bet they slip right back in when our backs are turned ;) Last week I found my daughters bow hairband full of holes, and man, was I vexed!!! Taking apart what was left of it, I proceeded to make a new one right away, taking pictures as I went. This little tutorial came out of it. Enjoy!
April 18, 2008
Bow hairband
Half a year has gone by like a whirlwind, with no time to craft, let alone post to my blog! Slowly, ever so slowly, our baby is now learning to sleep through the night, leaving me a little less exhausted than I have been all these months. Arrival of the spring season makes me want to clean up and finish all those projects that had been put on hold! As each year, by the end of winter, mice become a real pest at our house. They raid our laundry basket and eat the stains in the children's clothes, thereby ruining many a favourite piece ;( Ofcourse I'm to blame too: because I can't bear to kill them, we set live traps an expell them from the house when we catch 'em. I bet they slip right back in when our backs are turned ;) Last week I found my daughters bow hairband full of holes, and man, was I vexed!!! Taking apart what was left of it, I proceeded to make a new one right away, taking pictures as I went. This little tutorial came out of it. Enjoy!
October 17, 2007
She's three...

I can't believe how fast it all went... my baby has just turned three. A nostalgic present I made her was this travelling pouch for the little bunny rabbit. I wonder if many of you remember them from your own childhood. I recall making several when I was about 10 years old: cut off the bottom of a plastic canister (shower gel, fabric softener, whatever), pierce holes along the rim, and crochet a lovely pouch in no time! The exciting new thing in it for me was knitting an I-cord. I saw this at knittinghelp.com and had wanted to try it for a long time (just never got to it until now).
September 26, 2007
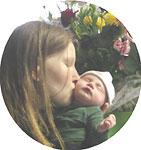
Arrrrr!

My little sister recently gave birth to a little boy, named Flint. That name rang a bell somewhere... Suddenly I remembered the TV-series I watched years ago on German television: Robert Louis Stevenson's Treasure Island. I enjoyed it very much, but when I hired a copy of the Walt Disney version sometime after that, I was sorely disappointed: it didn't come close! We're talking 1994 here, no Internet yet, I didn't even own a computer at the time... I knew of no way to get hold of that film. My enthusiasm instantly revived, I did a Google image search for 'Jim Hawkins' and recognised *my* film at once. It proved to be a French/German co-production: Die Schatzinsel (L'ile au trésor). Amazon.de carries it, so I ordered a copy right away. Arrrrr!!!! Anticipating it's arrival with delight, I made this hat for the newborn pirate (here modeled by my sweet and patient DD). It's loosely based on a tutorial at Tomlitoo, but done in fleece instead of paper.
For those of you that love the book and would like to read a few passages: Dead Men Tell No Tales offers the complete novel online for free, and sells tons of delightful pirate goodies too.
September 25, 2007
Chestnuts and acorns

How to amuse an -almost- three year old when it's raining AGAIN? The enormous amount of chestnuts in our garden prompted me to do a quick internet search. At Tête à modeler I found a tutorial for a cute little animal. Inka Grebner has some good suggestions too. I came up with this little bug; now ain't he sweet?
September 02, 2007
Keeping those tiny legs warm

It comes as no surprise that having a new baby in the house has kept me very busy. What spare time I had left those past ten weeks, went into sewing diapers and covers in all kinds of colours. I had previously made a number of different waterproof diaper covers to find the best fit, they did turn out gorgeous, but... I ended up liking none of them for the red marks they leave on my babe's tender skin. I like the felted wool covers much better (in the picture Lucie is wearing a triangle style felted wool cover, how to make those I learned at borntolove.com and Bright New Baby) and in addition I whipped up a bunch of fleece covers, using Stacey's method to draw a pattern. I also tried various kinds of diaper patterns, and for Lucie's slender thighs, Shar's version of Wee Weka Side Snap pocket adjusted to a NB size had the perfect fit. I left out the snaps and the Velcro though, as I prefer using Meghan Wyant's Velcro closer, which allows me to toss the dipes in the washing machine without having to bother about the Velcro tabs.
So far the only really new thing I've been able to try is making these baby leg warmers. I made them out of children's tights, as they appear to come much cheaper than ladies knee socks ;)) How to make them is shown by Baby Hopes. Can you believe we needed leg warmers in august this year!?!
June 26, 2007
VBAC

Now here was something I desperately wanted to try: to give birth to my second child the way my body was made to do. My first birthing experience wasn't too good. Our peaceful homebirth got all messed up. A cascade of interventions (all done in my best interest, yeah sure...) led to an emergency CS 24 hours later, and my sweet little girl I didn't get to hold or even touch the first few lonely hours after they stitched me up. I was grinding my teeth all through this second pregnancy, doing lots of research on VBAC and finding out how this happens to countless women around the globe. Visiting the pregnancy and birth forum at MDC almost every day, I became very well informed on the subject. So when my OB suggested we'd plan for an ERC at 38 weeks gestation, I freaked out. Because my scar didn't heal at all well at the time, she was afraid VBAC would be too risky, maybe even holding a 10% chance for rupture during labor. Eek!!! We asked for a compromise: doing an ultrasound of the lower uterine segment at 32 and again at 38 weeks, to see where we'd stand, and decide from there. And so we did: at 38 weeks I measured 4,4 mm, which is way beyond the cut-off (3,5 mm) most studies state as 'safe'. The deal was on!
We wrote a very clear birth plan, mainly stating that I wanted to be left alone, no drugs, no interventions whatsoever, and no staff in my room except for the (hospital) midwife. In return we agreed to constant EFM (external monitoring only) and promised to show up in hospital as soon as contractions were coming 5 minutes apart for over an hour. Now that was the nerve wrecking part. I knew that I would probably not be dilated much by then, but would need to maintain my calm to make any progress. And sure enough, contractions petered out once I set foot in that hospital room. Grrrrr! I don't exactly remember how I regained my confidence, but after three hours I was able to concentrate again, and things went smoothly from there. We called my acupuncturist and she came over to do some needlework on me. Contractions became much more intense right away, and as I was on the monitor, the midwife came running right in to find out what was going on. She never saw an acupuncturist at work before, and was quite puzzled by the obvious result :)) When the midwife came to check on me a few hours later, I couldn't believe my ears: 9 cm!! It was going to happen! My body did great! Then my bag of waters kind of exploded (really impressive that was, ha ha) and after 12 hours of labour, I was ready to push. Our Lucie was born easily: three pushes was all it took. They placed her on my belly right away, and three hours later we were home!!!
In retrospect I'm really thankful that my OB treated us so respectfully, thinking with me and not for me. And I'm delighted our birth plan was followed to the last detail. Who would have thought this was possible: same hospital, totally different birthing experience!!!
May 13, 2007
Cloth
 Finally! The first cloth diaper I've ever sewn! I used the free Mamabird pattern for this one, size newborn, and it's so tiny I think it might even work for a (not so small) preemie. The cover seems to fit nicely over it, and is by Meghan Wyant's free pattern, size small. The idea of using cloth for our second baby actually began to take shape a long time ago, when I was slowly getting bugged by the HUGE load of disposable diapers needed for just one (!) child. The need to go to the store to get them, the loads of waste and the cost all seemed to bother me more and more. Maybe I am getting more crunchy with age ;)) or it could have been this essay by Siobhan that appealed greatly to my imagination. Then there was also my enormous stash of fabric scraps in every possible colour.... yum! Something new to try out!!! Something to recycle, woohoo!!! Luckily I inherited a pile of plain white fitteds from my dear sister that will surely get us through at first, but in the long run I'm set on trying many different models, and maybe ultimately modifying some pattern for the perfect fit... But that is still miles away. In searching the net I found many great sites on the subject, of which Oz Cloth Nappies is one of the most resourceful (IMHO). Let me know what you think!
May 04, 2007
Car seat cover!
 How time flies when you're busy! These past few months I've been sewing a lot for the new one on the way, so no time for interesting experiments, alas! My latest accomplishment might also be quite boring to some of you: a stretch terry car seat cover. The look and touch of the original fabric I never liked, and as our new babe will have to be transported in it all summer long, I figured I might as well try and make a cover that's washable, soft, and comfortable when it's hot outside. So I just traced the thing, used thin elastic for fitting it on the car seat, and fold over elastic to finish the sides where the seat belt goes. To my surprise it was really a piece of cake: it took me only an hour or so to finish. Those of you that use a Maxi Cosy of the same model: feel free to ask for the pattern.
Edit: Dear Sarah, and those that have asked me for the pattern: the MC I had would by now classify as antique, since it's probably 14 years old now (I inherited it from my sister, and later gave it to a friend that gave it to a friend and so on...)
so my pattern would probably be of no use to anyone anymore. But in short, here's the working description to make one yourself, if you can sew it's really not hard to do.
Take the cover of your MC, and pay attention to how the elastic bands are fastening the cover to the plastic hooks in the seat (if it looks complicated, take a photo, so you'll have it for reference later).
Take a piece of waste cloth, woven, like an old blanket f.e. or some thick transparent plastic foil and pin it to the subsequent pieces the original cover is made of. Do this separately for each piece. In my case the cover had a middle part with three holes in it and two side parts. Trace the outline of the seams and the holes for the belts with a ballpoint or marker on your fabric. Use these as a pattern and cut from stretch terry, adding seam allowances for the inner seams and almost none for the outlines. Don't cut out holes in the middle piece, mere slits will give you a big enough hole already. Stitch pattern pieces to one another, and finish the outer edge, and the inner edge of the holes with fold over elastic. You'll probably need to add some loops of elastic band to attach the cover (it goes OVER the original) to the seat. Pay attention when taking out the belts, if needed take photographs, so you don't have to re-invent how to reassemble them (don't ask me how I know... :)
You can do this. And stretch terry is very forgiving, believe me. Good luck!
Subscribe to:
Posts (Atom)